


The spread of coronavirus (COVID-19) is leaving people around the world concerned over their families’ health, safety, job security, and education. To cope, students and adults alike have been picking up new hobbies, ranging from drawing to magic tricks. One of the most notable hobbies people have picked up during quarantine is sewing homemade face masks for themselves and hospital workers.
Hospitals are running low on supplies, including ventilators for patients and personal protective equipment (PPE) for healthcare workers, like N95 masks. PPE shortages are one of the most concerning issues in the global fight against COVID-19, as doctors and nurses in the United States have been working without sufficient supplies and have even resorted to garbage bags as gowns and bandanas as masks.
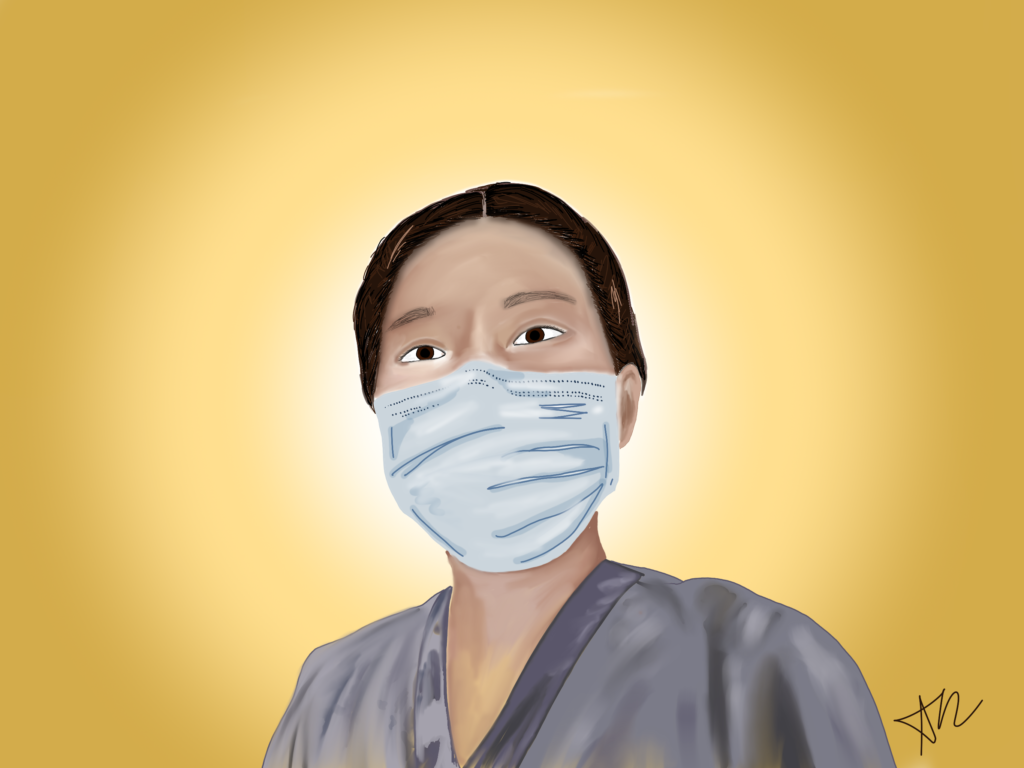
Although face masks aren’t as protective against the virus as N95 masks, they are still useful for healthcare workers and can help prevent the spread of disease.
“I got sick pretty early on and I didn’t want to risk catching/spreading anything so I wore a mask and gloves,” said senior Elizabeth Brandwein, who made her own face masks.
While individuals have little power over the national PPE market, many Americans have been stepping up by making face masks at home. St. Luke’s University Health Network in Bethlehem, Pennsylvania, for instance, recently received about 15,000 homemade face masks from local volunteers. Hospitals are still deciding exactly how to use and distribute these face masks effectively, especially since they are coming from places as far away as Africa and Europe.
Even Townsend Harris students are stepping up to the challenge. “I decided to make face masks because it [is now]… a requirement from the government and the facemasks online were very expensive and would take a long [time] to get delivered,” said sophomore Sophia Park. “I had extra fabric at home and my mom had a sewing machine which I have never used before, so I went on YouTube and searched videos on how to use them.” Sophia made masks for each one of her family members.
Not only are people making their own face masks, but they’re also adding their own creative touches. The standard medical masks, a blue or green color, have now been revamped with different colored fabrics along with fun graphics. Others have worn Halloween costumes with masks out and even dressed up their dogs and cats in small homemade masks. The creativity never ends, and the fact that these masks are useful in preventing the spread of disease is an added bonus.
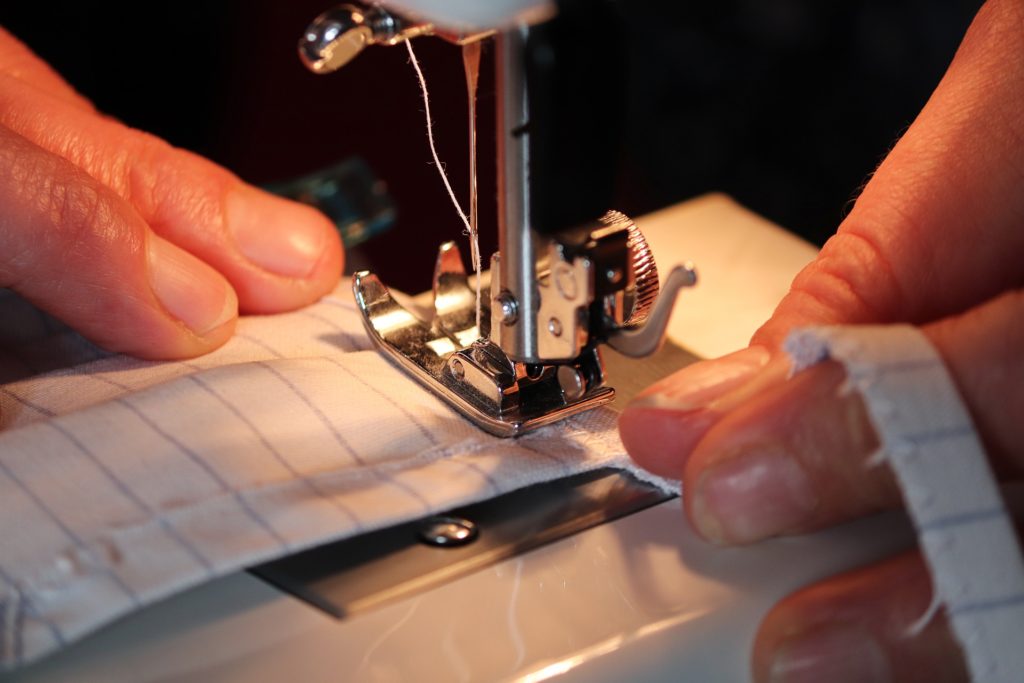
Since wearing face masks when out in public is mandatory in New York City, there has never been a better time to learn how to make your own. Harrisites can also get involved in this homemade face mask movement by learning how to make face masks at home and donating them to local hospitals, or making them for their own families. All you need is a sewing machine (or a needle and thread) and some fabric. You can find lots of popular Youtube tutorials for guidance, or follow these easy instructions below.
1) Take a plate and place it on a large sheet of fabric. Cut out a circle with a pair of scissors. Diameter measurements:
- Adult: 10-11 inches
- Teen: 9 inches
- Child: 8 inches
2) Fold it in half twice. You should get what looks like a quarter of a circle. Cut the whole shape along the fold, or crease (that you just made), which divides the whole fabric in half.
3) Once you make the incision, you should have two separate pieces of cloth. You’ll then see how there’s another fold (or crease) made on each of them. Make sure to cut along both of those folds.
4) Separate all of the pieces now. You should have four pieces of cloth left, which you’ll notice each make up a fourth of the circle.
5) Divide the four pieces into two groups. For each group, stack the pieces on top of one another respectively.
6) Using a needle and thread (or a sewing machine), sew the two stacked pieces together only on two of its three sides. Do this for both groups.
7) Open up both of the stitched pieces and stack them on top of one another. Make sure that all of the sides match up.
8) Start sewing the pieces together on all four sides.
9) On the left and right side of the mask, there will be two corners sticking out to the sides. Iron them, then fold them both a little (towards the inside of the mask) to form a small triangle.
10) From there, fold against the fold you just created, which forms a small rectangle. Start stitching the most inner edge of the fold to the mask to make sure that it doesn’t unfold itself over time.
- Only stitch the most inner edge of the fold. You want to leave space between the inner edge and the out edge of the mask for the string to weave through later on.
11) Repeat steps 9 and 10 for both the left and right side of the mask. At this point, you can see how there are no longer sharp corners sticking out on the sides, but rather flat, vertical edges.
12) Grab some spare string or shoelaces you have to start creating the earloops.
- Adult: 8 inches
- Teen: 7 inches
- Kid: 6 inches
13) Take the string and weave it through the small slots you created from step 11. Make sure that both ends of the string are still out in the open.
14) Take both ends of the string and tie a knot to form the earloop. Depending on your size, you may need to retie the string to fit your face.
15) Repeat steps 13 and 14 for both sides of the mask.
16) Congratulations! You have your first homemade face mask completed!
Here is a link to a video that corresponds with these written instructions:
https://www.youtube.com/watch?v=uRfhuRNua_E